
Thursday, July 12, 2012
Sewing projects: nursing cover

Sewing Projects: Fabric High Chair


Monday, February 13, 2012
Valentines or Mother's Day present

This is so neat but it took a lot of work trying to get the kids to cooperate. You simply have them post with their hands forming a fist. They have to extend the fisted hand and say "cheese". Make sure that they form a fist instead of just curling some fingers. You can tell from the two boys that the tight fist looks better.
Then you make two slit one above the fist and one below it. Insert your lollipop for Valentines Day or make a paper flower for Mother's day or teacher appreciation. I got the idea from http://24-7-365.blogspot.com/2009/02/lavish-me-with-praise.html
Teachers Appreciation for Valentines Day


I saw this post by simplyjstudio.blogspot.com. It's very simple to do but it took a while for me to find Rolos. You'll have to get the Rolos that are in a tube form. What you'll need : yellow color cardstock, pink color cardstock, aluminum foil, Hersey Kisses, dot glue, something to score with, edging scissors, and a cutter.
1) cut yellow cardstock paper to 4.5 x3.5. Score 1/2 an inch along the length of the paper. I prefer 1/2 inches rather than 1/4 inches. I use Martha Steward scoring board you can get 40% off at Hobby Lobby with their coupons. Cut bottom of the short end of the paper with the edging scissor.
2) cut pink cardstock paper 3.5x 1/8 inch. No need to score. Trace a circle of the Rolos to be the top of the eraser later.
3) cut aluminum foil smaller than pink cardstock.
Now wrap yellow scored paper around the roll of Rolos and glue the long side together. Do the same thing with the pink paper and foil. Use glue dot to stick the bottom of the Hersey Kisses to the Rolos. Add a heart with some ribbons and saying and you're done!
Monday, February 6, 2012
Crochet Train hat
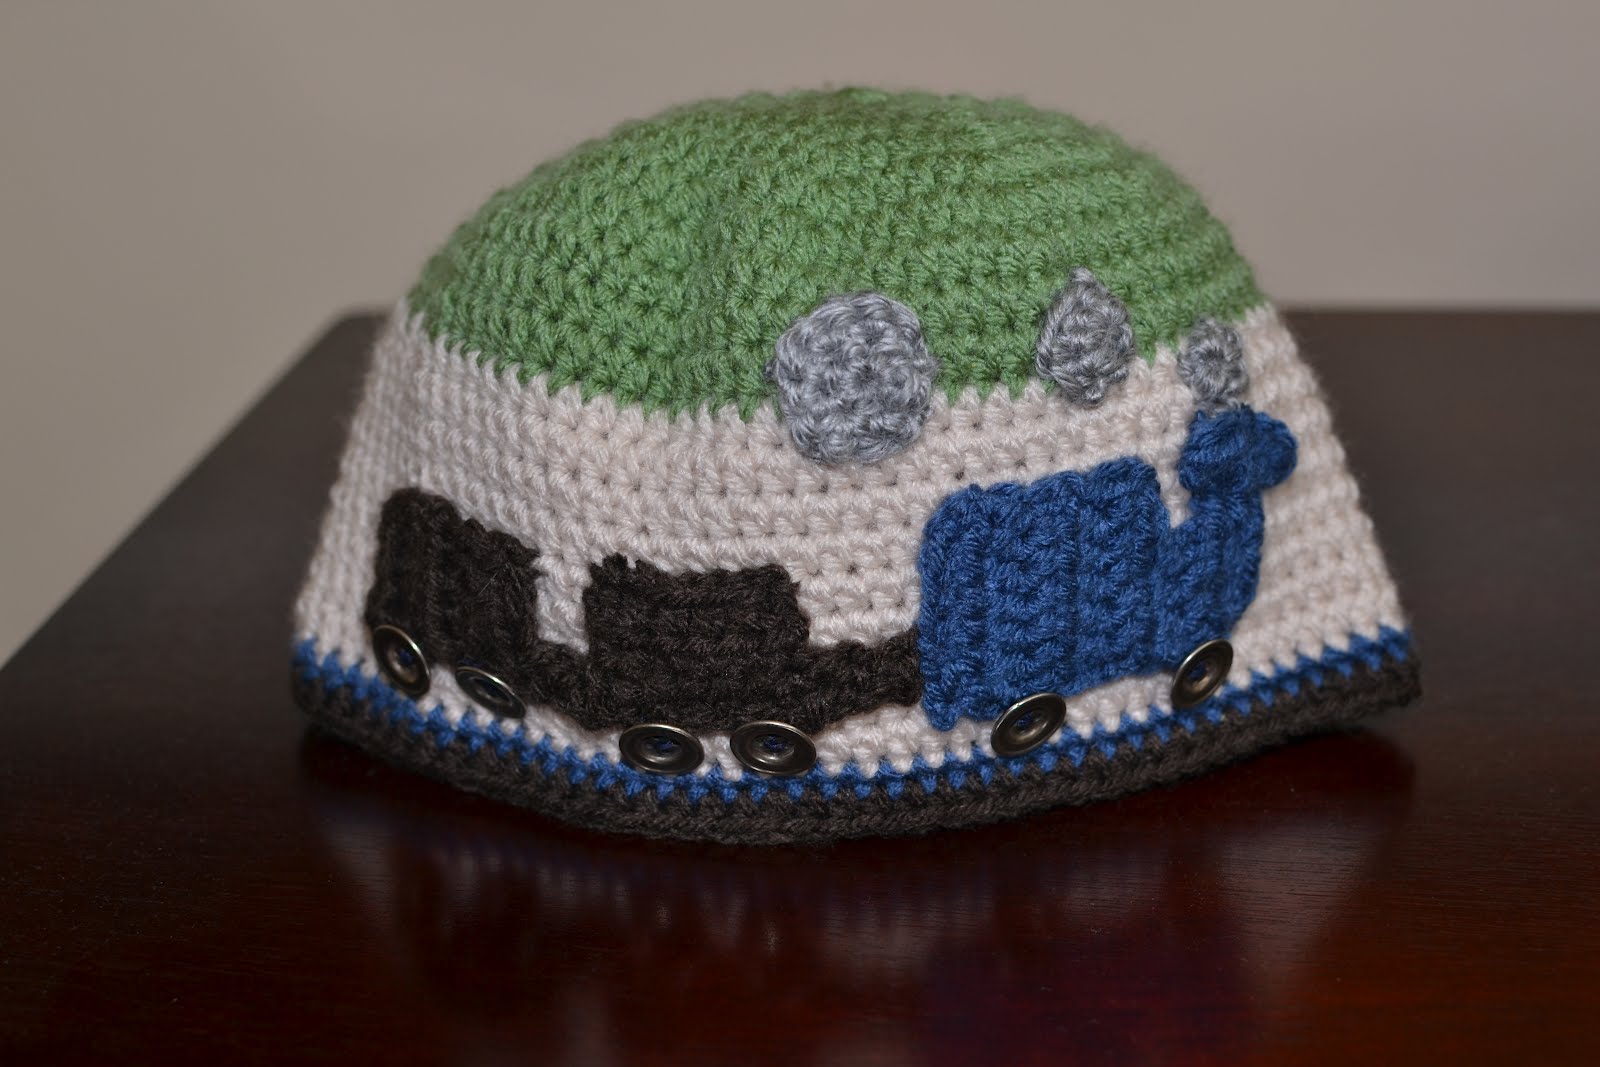
This is too adorable not to recreate. My sons love trains. We have train table and ride on train so naturally he should also have a train hat. Thanks to Amanda Brooke Crochet for the design inspiration. You can follow her on facebook through Bobwilson 123--Youtube Crochet channel. Tons of ideas and video tutorial sure to please. Message her on facebook and she can share with you this free pattern.
Thursday, February 2, 2012
Crochet Chocolate Kisses and detachable beard hat


Let me tell you I had so much fun making this project in time for Valentines Day. I saw this chocolate hat on Pea Pod Accessories on Facebook. I made the hat using the tutorial for "How to Make an Elf's Hat" by Bobwils
 on 123 on youtube. I just skip the tail part and started working a 6 hdc into a magic circle. Then I just follow the rest of the instruction on the video tutorial. Clare also provided written instruction. http://www.youtube.com/watch?v=SkQCpLk9xMA Yes, we're on first name basis now since I also follow her on Facebook. After I was done with the hat I added a ribbon with the printed word KISSES on there, like the chocolate kisses. I may go back and color in the words red for Valentines Day. I made one for each of my boys. **edit** To custom fit for different size head just measure the circumference of the crown of the head. Where the side start to go straight down. Work your increases up to that point only and continue with straight stitches till it measure down pass the ear a bit. At least I like mine below the ear a bit in case it shrinks in the wash.
I also made a detachable beard to go with my older son's hat. He can wear it alone or with the hat and I also gave it a try and it fits :-). I used a size J/10 6.00mm hook and Baby Bee Pitter Patter Eyelash Yarn in chocolate.
http://www.youtube.com/watch?v=5djCKMi4sIE
Sunday, January 29, 2012
Felt board sight words sentences


You can make your own board using any frame and adding felt material to it. I have an easel from Ikea and I don't use the blackboard side so I decided to cover it with felt. I attached it using velcro to the four corners. You could stick it in more places if you want to really secure it. I laminated the sight words so they can last a long time. I also attached a small piece of velcro to the back of the words. They easily stick to the felt material. My son likes legos and building things and he already had a tool box with mega blocks so I just use a label and wrote sight words on them. He can put the blocks together to make sentences too. You can also just use masking tape and stick that on the block and just write your sight words on it. I recently also got word family bingo from Amazon to help improve his reading skills.
I have a youtube video that shows this. http://www.youtube.com/watch?v=ujgBfQD-31c&feature=youtu.be
Subscribe to:
Posts (Atom)